


Pro-Q Smokers & BBQs
Pro-Q Smokers & BBQs
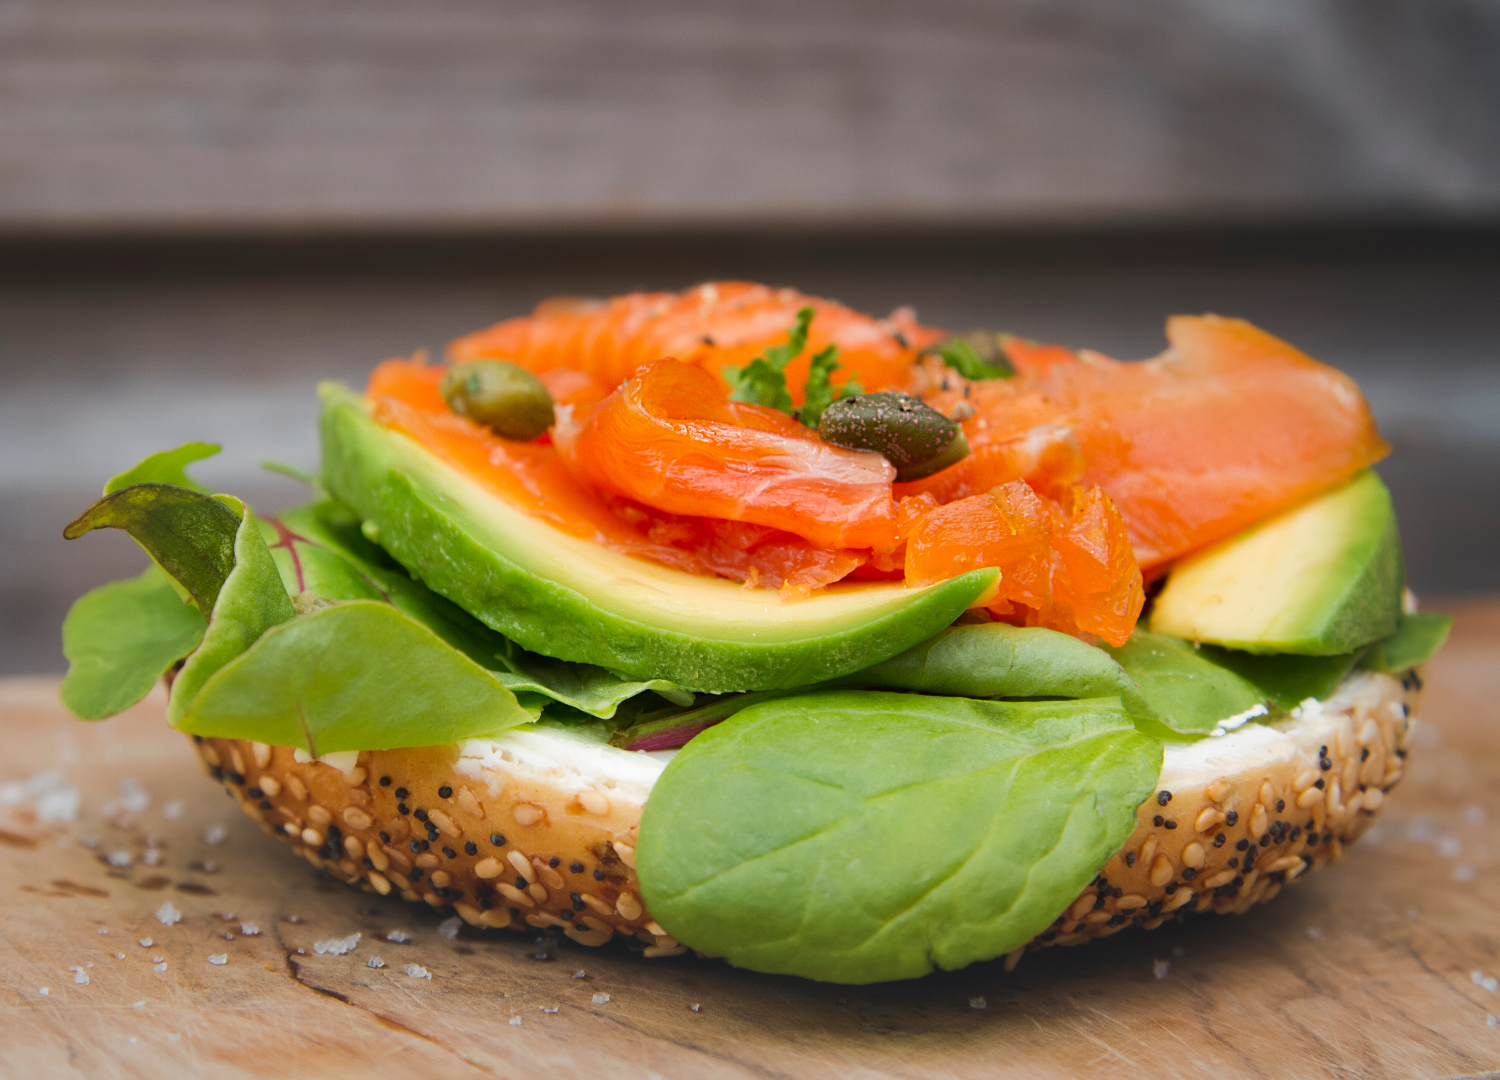
Home-Cured Salmon
OVERVIEW
METHOD
Curing
Prep Time
36 Hours
Cooking Time
3 Days
Serves
3-4
Ability
Intermediate
INGREDIENTS
- 1 Whole Side of very Fresh Salmon Fillet with the skin on – approx. 1kg
- ProQ Salmon Cures
- A Food Safe Dish/Tray
Do not worry if the fish is not pin-boned – it is easy to remove these once the salmon has been cured.
INGREDIENTS
- 1 Whole Side of very Fresh Salmon Fillet with the skin on – approx. 1kg
- ProQ Salmon Cures
- A Food Safe Dish/Tray
Do not worry if the fish is not pin-boned – it is easy to remove these once the salmon has been cured.
METHOD
Make sure your fish is as fresh as possible. It should look like it has just come out of the water, eyes are clear, gills are pink and the skin should not be slimy. If you want to be extra cautious, you can freeze and then defrost your side of salmon before curing.
Step 1
Lay your side of salmon, skin-side down on a clean work surface or large chopping board. Cut the salmon in half so that each piece will easily fit into a food safe bag.
Step 2
Now place the two salmon pieces into a suitably sized food tray – a baking tray or roasting tin is fine. Empty the contents of one curing pouch onto the first piece of salmon – gently rub the cure into the flesh. Repeat the process with another curing pouch on the second piece of salmon.
Tip
Try to use less cure on the thinner parts of the fish, such as the tail and belly – this will help to ensure the salmon is cured evenly.
Step 3
Put each piece of salmon into a food safe bag and seal well. Place both bags of salmon, skin-side down, onto a tray. Then place another tray on top and weigh down with a few cans or an empty casserole dish. Leave in the fridge for 24 - 36 hours, remembering to turn the bags after 24 hours - this helps to evenly distribute the cure.
Step 4
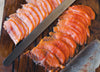
Remove the salmon pieces from the bags and rinse the fish under cold running water to wash off the cure. Pat dry with some kitchen towel.
Step 5
Hang the fillets in your fridge using a meat hook. Ensure you insert the hook into the thickest end of the salmon. Place a tray below to catch any liquid drips. Keep the salmon in the fridge for a further 24 hours.
Tip
If you have glass shelves in your fridge and cannot use a hook, then lay the salmon on a wire rack with a tray beneath to catch any dips.
Step 6
Your cured salmon is now ready to eat! Slice thinly and serve with your favourite accompaniments – perhaps some brown bread & butter with a squeeze of lemon or some rye bread with horseradish cream. Enjoy!
Advice
Keep the salmon refrigerated and consume within 5 days.