Cold Smoking
An ancient art used for preserving food, cold smoking has been used across the world for generations. Modern cold smoking is all about flavour, and less about preservation as we now use curing to make food safe to store.

Cold smoking is a process that not only adds flavour, but also aids in curing certain foods when used in conjunction with traditional curing methods. It's easy, fun and can produce some amazing results, but there are a few things that should be taken into account.
(Food) Safety First
Temperature plays a big role in food safety, particularly when processing uncooked meat or fish, cold smoking isn't cooking the food in any way, so you need to be aware of what temperature you're smoking at, and be aware that some products (such as bacon) will need cooking before eating.
Cold smoking as a general rule should be done at temperatures as low as possible, and meats and fish should not be kept at room temperature for any longer than necessary. We recommend that cold smoking is done in winter and if possible, overnight when the temperatures drop.
You should keep an eye on the temperature in your smoking chamber, preferably with a digital thermometer, and if it rises above 21°C / 71°F it should be removed and refrigerated for a couple of hours before you start again.
Methods for Getting Cold Smoke
The easiest way to produce smoke without heat is with our ProQ® Cold Smoke Generator, which will produce clean, cool smoke for up to 10 hours. If you don't have one yet, here are another couple of methods that might work for you;
Smothered Coals
This method is better suited to really quick cold smokes like cheese, be sure to keep an eye on the temperature as you are using a fire with this method.
Step 1
Get 3 or 4 charcoal briquettes going in a chimney starter and place them in the base of your smoker, without the charcoal basket.
Step 2
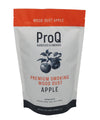
Smother the briquettes with wood dust, 1-2 cupfuls should be enough. This will allow the wood to smoulder and reduce the heat given off by the briquettes.
Step 3
Place the water pan in your smoker, with cold water or ice to help keep the temperature down if necessary.
Step 4
Add your food to the grills with the lid on the smoker. Open the vent in the lid and one vent in the base to allow some airflow.
Step 5
This should give you smoke for around an hour, simply add more wood dust and 1-2 briquettes as it runs out for a longer smoke.
Sieve Method
This is a great method to experiment with, but does have it's faults, the burn isn't very long and depending on the mesh, wood and airflow it tends to be fairly unreliable and can go out.
Step 1
Grab yourself a cheap kitchen sieve (preferably Stainless Steel), and push the centre up to form a cone in the middle, and a trough around the outside.
Step 2
Fill the donut shaped trough with wood dust or pellets but leave a gap in the ring so it doesn't burn from 2 ends.
Step 3
Light one end with either a tea-light or a kitchen torch, and place it into your cold smoking cabinet or BBQ smoker with (but away from) your food.


-v1573136355564.JPG?5184x3456)
